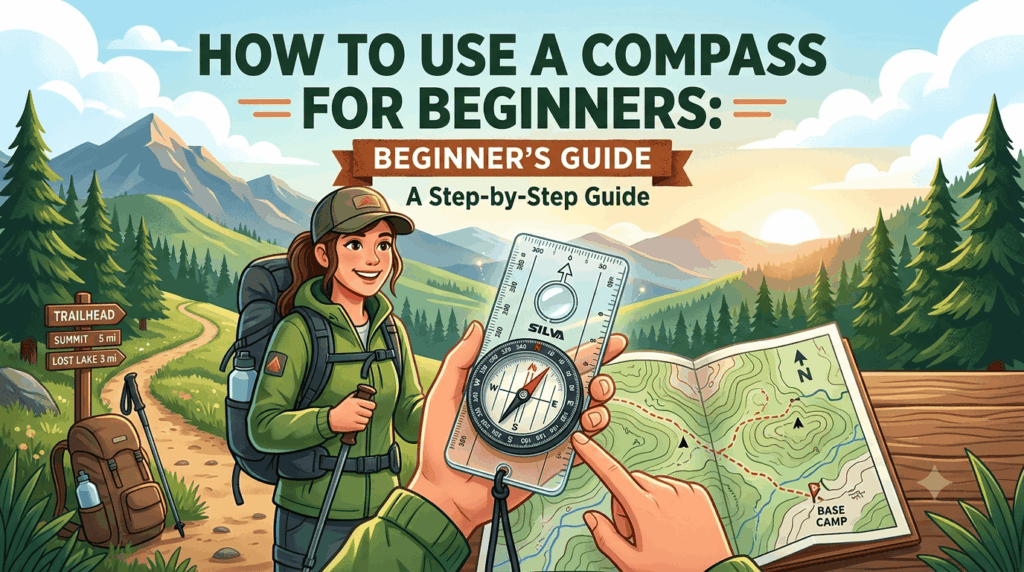
How to Use a Compass for Beginners: A Step-by-Step Guide.
Introduction
Knowing how to use a compass is a useful skill for anyone who enjoys hiking, camping, travelling or exploring unfamiliar places. Although smartphones and GPS devices make navigation easier, they depend on batteries, signals and working technology. A traditional compass offers a simple way to understand directions without relying on an electronic device.
At first, a compass might look confusing because it has a moving needle, numbers, direction markings and a rotating dial. However, its basic operation is straightforward once you understand what each part does.
You do not need advanced navigation knowledge to get started. With a little practice, you can learn how to identify north, understand the four main directions, follow a bearing and use a compass alongside a map.
This beginner-friendly guide explains how to use a compass step by step, including practical examples, common mistakes and useful safety tips.
1. Understand How a Compass Works
Before using a compass, it helps to understand its basic purpose.
A traditional magnetic compass contains a magnetised needle that can rotate freely. It responds to Earth’s magnetic field and aligns approximately with the direction of magnetic north.
The needle usually has a coloured end that identifies the north-seeking direction. On many hiking compasses, this end is red, although the colour can vary between models.
When you hold a compass correctly on a level surface, the needle settles into a direction. You can use this information to work out which way you are facing.
For example, if the north end of the needle points towards a particular direction, south is directly opposite. East and west are positioned at right angles to north and south.
Important: A compass points towards magnetic north, not necessarily true north. The difference between these directions is called magnetic declination. We will explain this later in the guide.
2. Learn the Basic Parts of a Compass
A standard baseplate compass is a useful choice for beginners. It contains several parts that help you understand and follow directions.
Here are the main components:
Magnetic Needle
The magnetic needle is the moving part inside the compass. It aligns with the local magnetic field, and its marked end indicates the north-seeking direction.
Wait for the needle to stop moving before taking a reading.
Compass Housing
The compass housing is the circular section that holds the magnetic needle. It usually contains direction markings and degree measurements.
Rotating Bezel
The rotating bezel, also called the compass dial, allows you to select a direction or bearing. It generally contains markings from 0 to 360 degrees.
Direction-of-Travel Arrow
This arrow shows the direction in which you should move when following a selected bearing. It is usually marked on the compass baseplate.
Orienting Arrow
The orienting arrow is located inside the compass housing. You use it to align the compass dial with the magnetic needle.
Baseplate
The baseplate is the flat, often transparent section of the compass. It helps you place the compass on a map and measure directions between locations.
Understanding these components makes it much easier to use a compass correctly.
3. Understand the Four Main Compass Directions
A compass helps you identify four primary directions:
- North (N): Usually marked at 0 or 360 degrees.
- East (E): Marked at 90 degrees.
- South (S): Marked at 180 degrees.
- West (W): Marked at 270 degrees.
These directions are the foundation of basic navigation.
For example, if you are facing north, east is on your right and west is on your left. South is directly behind you.
There are also four intermediate directions:
- Northeast (NE)
- Southeast (SE)
- Southwest (SW)
- Northwest (NW)
These help you describe directions more accurately.
Understanding Compass Degrees
Many compasses use a 360-degree scale to show directions.
| Direction | Compass Bearing |
|---|---|
| North | 0° or 360° |
| Northeast | 45° |
| East | 90° |
| Southeast | 135° |
| South | 180° |
| Southwest | 225° |
| West | 270° |
| Northwest | 315° |
You do not need to memorise every degree when starting out. Begin by learning the four main directions and then practise using intermediate directions.
4. How to Use a Compass for Beginners: Step-by-Step Instructions
Now that you understand the basic parts and directions, it is time to learn how to use a compass.
Start practising in an open, familiar area where you can easily recognise nearby landmarks.
Step 1: Hold the Compass Correctly
Place your compass on a flat surface or hold it steadily in your open palm.
Keep it horizontal so the magnetic needle can move freely. Avoid tilting the compass because the needle may not settle correctly.
Make sure you are standing away from objects that could interfere with its reading, such as:
- Large metal objects
- Vehicles
- Metal fences
- Magnetic equipment
- Electronic devices that may affect the compass
Give the needle a few seconds to settle.
Step 2: Find North
Look at the moving needle and identify its north-marked end.
On many traditional compasses, this end is red. However, always check your compass instructions because markings can differ between models.
The marked end indicates magnetic north.
Once you have identified north, you can work out the other directions:
- East is to the right of north.
- West is to the left of north.
- South is opposite north.
This is the first important skill to practise when learning compass navigation.
Step 3: Identify Which Direction You Are Facing
Hold the compass flat in front of your body.
Turn your entire body slowly while keeping the compass level. Stop when the magnetic needle settles.
Compare the needle’s direction with the direction-of-travel arrow and the compass markings.
For a basic directional check, identify where magnetic north is pointing and compare it with your intended direction.
For example, if you want to face east, turn until you are facing approximately 90 degrees clockwise from magnetic north.
Remember that the direction you are facing and the direction in which the needle points are not the same thing.
Step 4: Learn to Follow a Direction
Once you can identify north, practise walking in a simple direction.
For example, suppose you want to walk east.
- Hold the compass flat.
- Identify magnetic north.
- Turn your body until you are facing east.
- Look ahead and choose a visible landmark in that direction.
- Walk towards the landmark.
- Stop occasionally and check your direction again.
Using a visible landmark makes it easier to maintain your direction without constantly looking down at the compass.
Repeat this exercise with north, south and west.
Step 5: Practise Using Compass Bearings
A bearing is a direction expressed in degrees, measured clockwise from north.
For example:
- 0° means north.
- 90° means east.
- 180° means south.
- 270° means west.
To follow a bearing with a standard baseplate compass:
- Hold the compass horizontally in front of you.
- Rotate the compass bezel until your chosen bearing lines up with the index mark.
- Keep the direction-of-travel arrow pointing away from your body.
- Turn your entire body until the north end of the magnetic needle sits inside the orienting arrow.
- Look along the direction-of-travel arrow.
- Choose a landmark in that direction and walk towards it.
- Repeat the alignment process as needed to stay on course.
For example, if you want to follow a bearing of 90 degrees, set the compass to 90 degrees and turn until the magnetic needle aligns with the orienting arrow. The direction-of-travel arrow should then point east relative to magnetic north.
Always check your compass model’s instructions, especially if it has adjustable declination.
5. How to Use a Compass Without a Map
You can use a compass to identify directions even when you do not have a map.
This is useful when exploring an unfamiliar outdoor area or practising basic navigation skills.
Follow these steps:
- Find a safe, open location.
- Hold the compass horizontally.
- Wait for the magnetic needle to settle.
- Identify the north-seeking end of the needle.
- Work out the remaining directions.
- Choose a visible landmark in your intended direction.
- Walk towards it and check your direction regularly.
For example, if you want to walk towards the west, identify west using the compass markings and choose a landmark in that direction.
However, remember that a compass without a map cannot tell you your exact location or identify the safest route to an unknown destination.
It only helps you understand direction. You still need to pay attention to the surrounding landscape, obstacles and possible hazards.
6. How to Use a Compass with a Map
A compass becomes more useful when you combine it with a suitable map.
A topographic map shows natural and man-made features such as hills, rivers, roads, buildings and trails. A compass helps you understand how those features relate to the direction you are facing.
Step 1: Place the Map on a Flat Surface
Open your map and identify your current location, destination and the north direction indicated on the map.
Most conventional maps place north at the top, but always check the map’s orientation.
Step 2: Place the Compass on the Map
Put the compass on the map so its direction-of-travel arrow points from your current location towards your destination.
Align the straight edge of the baseplate with the line connecting the two locations.
Step 3: Rotate the Compass Dial
Turn the rotating bezel until the orienting lines inside the compass are parallel with the north-south grid lines on the map.
Make sure the north marking on the compass dial points towards map north, not south.
Step 4: Read the Bearing
Look at the index line on the compass to read the bearing.
This gives you the direction from your starting point towards your destination.
Step 5: Follow the Bearing
Lift the compass from the map and hold it horizontally.
Turn your body until the magnetic needle aligns with the orienting arrow, taking the local magnetic declination into account.
The direction-of-travel arrow should now point towards your selected direction.
Choose a visible landmark along the bearing and move towards it. Check your position and direction regularly.
Note: Map and compass navigation requires correct declination adjustment. The precise steps depend on whether your compass has adjustable declination and which north reference your map uses.
7. What Is Magnetic Declination and Why Does It Matter?
Magnetic declination is the angle between magnetic north and true north.
True north refers to the direction towards the geographic North Pole. Magnetic north is the direction indicated by a compass needle.
These directions do not always match. The difference changes depending on your location and over time.
Why does this matter?
Imagine that you are following a compass bearing over a long distance. If you ignore a significant difference between magnetic north and true north, you may gradually move away from your intended route.
Before using a map and compass for outdoor navigation:
- Check the magnetic declination for your destination.
- Use a recent value rather than relying on an old map.
- Check whether your compass supports declination adjustment.
- Follow the manufacturer’s instructions when setting the adjustment.
- Make sure your map bearing and compass reading use compatible north references.
You can check magnetic declination using the National Centers for Environmental Information’s official resource:
NOAA/NCEI Magnetic Declination
Do not assume that the declination is the same everywhere. It varies by location.
8. Common Compass Mistakes Beginners Should Avoid
Learning how to use a compass takes practice. Beginners often make a few simple mistakes that can affect their readings.
Here are some common problems to watch out for.
Holding the Compass at an Angle
A compass should be held horizontally while taking a reading. Tilting it can interfere with the movement of the needle.
Solution: Keep the compass level and wait until the needle settles.
Confusing the Needle with the Direction-of-Travel Arrow
The magnetic needle indicates magnetic north. The direction-of-travel arrow shows where you should move when following a selected bearing.
Solution: Learn the purpose of both markings before attempting to navigate.
Ignoring Magnetic Declination
Using a map bearing without accounting for declination can lead to directional errors.
Solution: Check the local declination and adjust your compass or bearing according to the equipment instructions.
Standing Near Metal Objects
Metal objects and magnetic interference can affect compass readings.
Solution: Move away from vehicles, fences, metal structures and other possible sources of interference before taking a reading.
Looking at the Compass Too Often While Walking
Constantly looking down at the compass can make it difficult to notice obstacles and changes in the terrain.
Solution: Choose a visible landmark along your bearing, walk towards it and check your direction again when you reach it.
Assuming a Compass Shows Your Exact Location
A compass tells you direction, not your exact position.
Solution: Use a suitable map, recognisable landmarks and other navigation methods to understand where you are.
9. Practical Tips to Improve Your Compass Skills
The easiest way to become comfortable with a compass is to practise regularly.
You can begin with simple exercises before trying more advanced navigation.
Start in a familiar place: Practise in a park, garden or open area where you already know the surroundings.
Learn the basic directions: Identify north, south, east and west until you can recognise them quickly.
Practise different bearings: Try following 45°, 90°, 180° and 270° to understand how compass readings work.
Use a paper map: Learn how to identify your location and compare map features with the surrounding landscape.
Keep your compass accessible: Store it somewhere safe and easy to reach, rather than leaving it at the bottom of your backpack.
Check your equipment: Make sure the compass needle moves freely and the markings are easy to read.
Practise before a trip: Do not wait until you are lost or facing difficult conditions to learn how your compass works.
Most importantly, develop your navigation skills gradually. A compass is a useful tool, but knowing how to interpret your surroundings is equally important.
10. Is a Compass Still Useful in the Age of GPS?
Yes. A traditional compass remains useful even though GPS devices and smartphone navigation apps are widely available.
GPS technology can help you identify your location, plan routes and track your movement. However, electronic devices may run out of battery, lose signal or stop working because of damage.
A traditional compass does not need a battery or mobile network to indicate magnetic direction.
The two tools also serve different purposes:
| Feature | Traditional Compass | GPS Device |
|---|---|---|
| Shows direction | Yes | Yes |
| Requires a battery | No | Usually yes |
| Requires a mobile network | No | Not necessarily |
| Shows exact location | No | Yes, when functioning and with a position fix |
| Works with a paper map | Yes | Yes, depending on the device |
| Can be affected by magnetic interference | Yes | Not in the same way |
For outdoor activities, learning both traditional and modern navigation methods can be helpful.
A compass, a suitable map and basic navigation knowledge provide useful backup when electronic equipment is unavailable.
11. Basic Safety Tips When Using a Compass Outdoors
Knowing how to use a compass does not automatically make every outdoor journey safe. You should also understand the limitations of your equipment and the environment.
Keep these safety points in mind:
- Carry a suitable map of the area when travelling unfamiliar routes.
- Check weather conditions before leaving.
- Tell someone about your route and expected return time.
- Carry enough water, food and essential supplies.
- Keep your phone or GPS device charged where possible.
- Avoid unfamiliar routes without adequate preparation.
- Do not rely on a compass alone to cross dangerous terrain.
- Learn how to use your map and compass together before attempting challenging hikes.
If you become unsure about your location, stop somewhere safe and assess your surroundings rather than continuing in an uncertain direction.
For difficult outdoor trips, consider learning navigation from an experienced instructor or outdoor training organisation.
Conclusion
Learning how to use a compass for beginners is easier than it may first appear. Once you understand the magnetic needle, compass markings and four main directions, you can start practising basic navigation.
Begin by finding north, identifying your direction and following simple bearings. As your confidence improves, learn how to use a compass with a map and understand magnetic declination.
Remember that a compass is a navigation tool, not a complete navigation system. Combining it with map-reading skills, outdoor awareness and proper preparation will help you navigate more confidently.
Whether you are preparing for a hiking trip, planning a camping adventure or simply learning a useful life skill, practising with a compass is a good place to start.
How do you use a compass for beginners?
Start by holding the compass horizontally and identifying the north-seeking end of the magnetic needle. Learn the four main directions, then practise turning towards a chosen direction. Once comfortable, learn how to set and follow compass bearings.
How do I know which way is north on a compass?
Wait for the magnetic needle to settle and identify its north-marked end. On many traditional compasses, this end is red. Check your compass markings because colours can vary between models.
What are the four main directions on a compass?
The four main directions are north, east, south and west. North is 0° or 360°, east is 90°, south is 180° and west is 270°.
Can I use a compass without a map?
Yes. You can use a compass without a map to identify directions and follow a selected bearing. However, a compass alone cannot tell you your exact location or show you the safest route to an unfamiliar destination.
What does 90 degrees mean on a compass?
A compass bearing of 90 degrees indicates east when measured clockwise from north. Similarly, 180 degrees indicates south and 270 degrees indicates west.